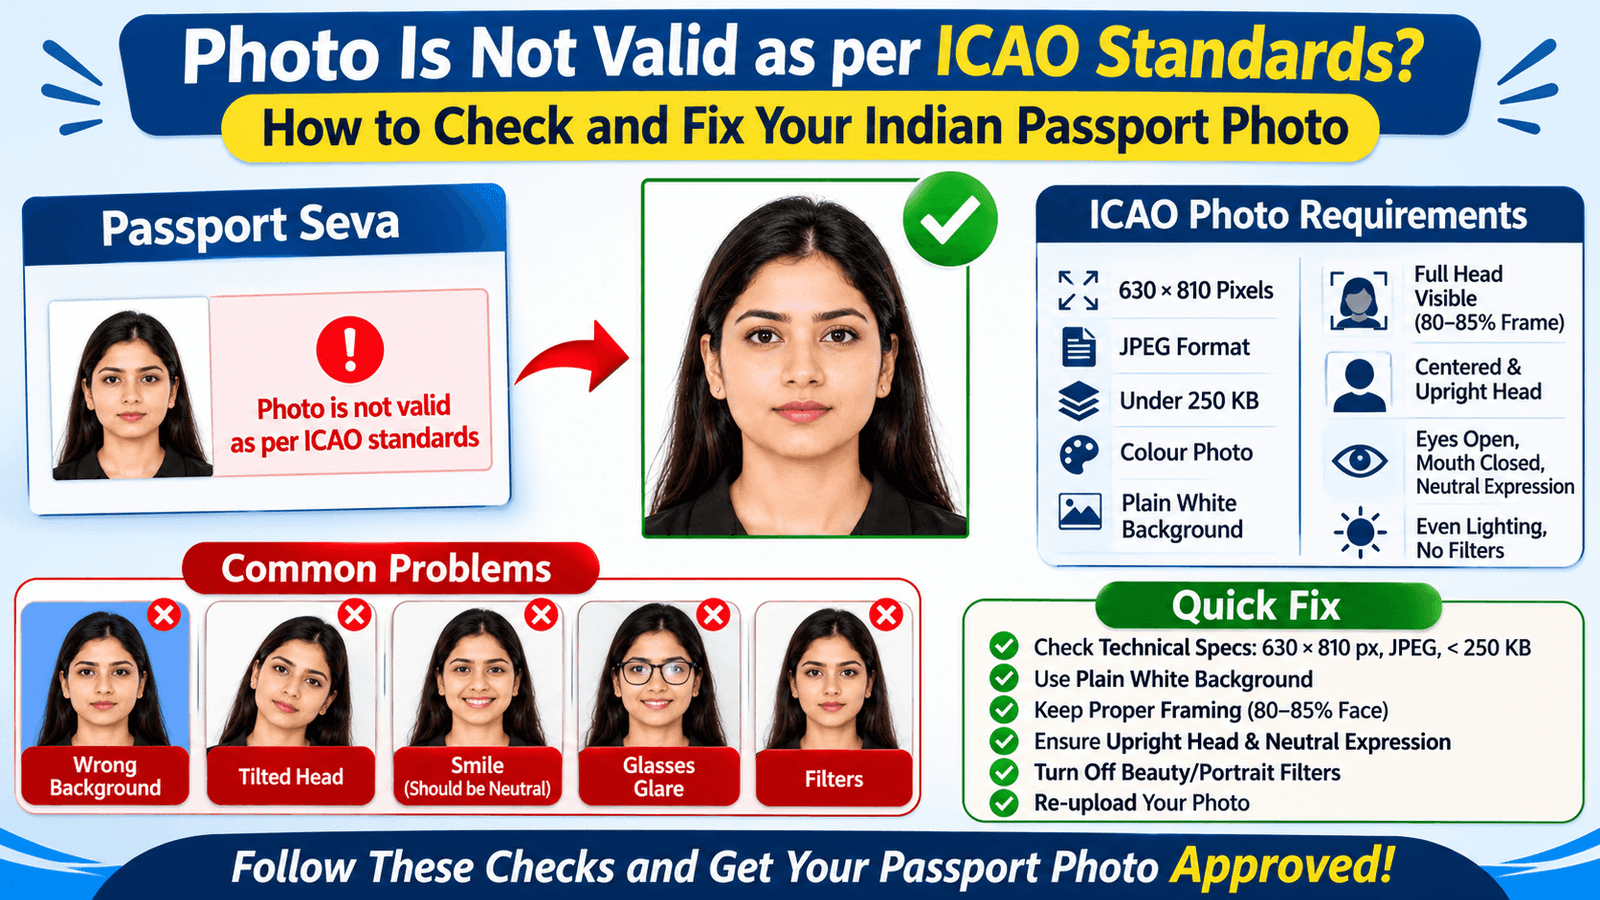

You’ve uploaded your photo to the Passport Seva portal, and the system has returned the message “photo is not valid as per ICAO standards.” It’s a frustrating result, especially when the picture looks clear and natural on your phone. Many applicants search for variations of this error, such as “photo not valid as per ICAO standards” or “photo is not comply with ICAO standards,” and most of them are dealing with the same underlying issue: the image doesn’t match one or more technical or visual rules in the ICAO specification. This guide explains what the rules require, why a good-looking photo can still fail, and how to fix the problem quickly.
What the Error Message Means
The ICAO (International Civil Aviation Organization) publishes specifications for photos used in passports and other travel documents. These specifications exist so that the photo works with automated face-recognition systems as well as with officers who compare the photo against the applicant. When the portal says a photo is not valid, its automated screening has detected at least one departure from these rules.
The message is broad, and it doesn’t always say which rule failed. That’s why troubleshooting matters. Instead of retaking the photo at random, work through the likely causes in order: technical specifications first, then background, framing, pose and finally any edits or filters.
Check the Technical Specifications First
Technical errors are the easiest to identify and fix. Open the file’s properties and confirm the following:
- Dimensions: 630 × 810 pixels, in portrait orientation. A square or landscape image will fail even if the face looks correct.
- Format: JPEG (.jpg). PNG, HEIC and PDF files are common reasons for a failed upload.
- File size: Under about 250 KB. This is a practical limit that most guidance recommends, and the portal also caps the combined size of all uploaded documents at 1 MB.
- Colour: A colour photo, not black and white or a scan of a printed picture.
Many applicants who search for “indian passport photo size” are looking for these exact numbers. If your file doesn’t match them, resize and re-export it from the original digital image rather than from a screenshot or a re-saved copy. Each re-save adds compression, so starting from the original keeps the image sharp.
Look at the Background
The background is the second most common cause of the error. The ICAO standard calls for a plain, light background, and in practice this means pure white. A wall that looks white in a dim room may actually be cream, grey or slightly textured. Shadows cast by your head or shoulders can also fail the check.
If the background is close to white but not quite there, you can usually correct it with a background-removal tool or a simple editor. Fill the area with pure white and zoom in to make sure no grey outline or halo remains around your hair and shoulders. If a shadow falls across your face, however, editing won’t solve the problem, and you’ll need to retake the photo against a plain white wall or sheet.
Check the Framing and Head Size
An incorrectly framed photo triggers many automatic rejections. The ICAO standard expects the full head to be visible, from the top of the hair to the bottom of the chin, with the head centred and the face filling roughly 80 to 85 percent of the frame. The photo should show the top of the shoulders, but the head should be the main focus.
Common framing problems include a head that’s too small because the photo was taken from too far away, a head that’s cut off at the top or chin, and a face that sits off-centre. You can often correct the crop by trimming and recentring the original image before resizing it to 630 × 810 pixels. Avoid stretching the image to fill the frame, since distortion can cause a different failure. If the face looks tiny even after careful cropping, retake the photo from about 1.5 metres away with the camera at eye level.
Check the Pose and Expression
Pose and expression are often overlooked. A photo can meet every technical rule and still fail because the head is tilted, the face is turned slightly to one side or the mouth is open. The ICAO standard calls for a neutral expression, a closed mouth, eyes fully open and a head that’s upright and facing the camera directly.
Test your photo by drawing an imaginary vertical line through the centre of your face. The line should sit in the middle of the frame, and your eyes should be level. If your head is leaning, a smile is showing or your eyes are partly closed, retake the photo. These problems can’t be fixed through editing without risking another failure.
Remove Filters and Unwanted Edits
Many phones apply beauty filters, skin smoothing, portrait-mode blur and sharpening by default. These modify the image even when you haven’t asked for them, and they can cause the portal to flag the photo as altered. Before taking the photo, switch off beauty, portrait and face-retouch modes in your camera app. After taking it, avoid brightness, contrast or skin-tone adjustments, since these can also make the photo look artificial.
The ICAO standard allows only basic corrections, such as cropping, resizing and background cleaning. Anything that changes the appearance of the face is likely to be treated as an invalid edit.
Use an Online Passport Photo Checker
Once you’ve corrected the obvious problems, an online passport photo checker can help you find the ones you missed. A checker compares your image against the specification and points out problems with dimensions, background or framing before you upload. It’s a quick way to catch small issues that are hard to see with the naked eye.
If you’re looking for an icao standards photo online free option, you can start with our online passport photo checker to test your image before submitting it. For preparing a new photo from scratch, the ICAO photo tool helps you crop and format the image to the required specification. Whichever tool you use, make sure to review the result yourself, because a checker is a helpful guide rather than an official approval.
Understand the Indian Requirements
Requirements can vary by country and by application type, so it’s worth confirming the specifications that apply to your Indian passport application. The core technical requirements, including the 630 × 810 pixel size, JPEG format and plain white background, are set out in our guide to Indian passport photo requirements. Printed application forms use a different size, typically 3.5 × 4.5 cm, so keep the two formats separate when you prepare your photos.
If you want a deeper understanding of the standard before you begin, our explainer on the ICAO-compliant passport photo covers the principles behind each requirement, which makes it easier to spot problems in your own photo.
A Step-by-Step Recovery Plan
When your photo is rejected, a structured approach saves both time and attempts. Start by reading the exact message on the portal. Then work through this sequence:
- Confirm the file is a JPEG, 630 × 810 pixels, under about 250 KB.
- Check the background for tints, textures and shadows, and correct it to pure white if the problem is minor.
- Confirm the full head is visible and the face fills roughly 80 to 85 percent of the frame.
- Check the pose: head upright, eyes open, mouth closed and a neutral expression.
- Remove any filters or edits, and re-export from the original image if needed.
- Run the photo through an online checker before uploading.
If the problem is a shadow on the face, a tilted head, a smile or glasses glare, retake the photo. Choose a time with good daylight, stand facing a window, use a plain white backdrop and set your phone at eye level. Take five or six shots and select the sharpest one with even lighting and open eyes.
Avoiding Repeated Rejections
Each failed upload counts toward your limited attempts, so careful preparation matters. Keep a clean, original copy of your best photo so you don’t have to edit a file that’s already been compressed several times. Save each version under a new name so you can compare them. Before every upload, go through the checklist one more time, rather than assuming that a previously accepted photo will pass again.
Frequently Asked Questions
Why does the portal say the photo is not valid even though it looks fine?
The portal’s automated screening checks technical details that aren’t visible to the eye, such as exact pixel dimensions, file format, file size and background colour. A slight grey tint, a faint shadow or a beauty filter can cause a failure even when the photo looks natural.
Can I fix an invalid photo without retaking it?
Sometimes. Technical issues like file format, dimensions and background colour can usually be corrected by editing the same image. Shadows on the face, a tilted head, a smile, closed eyes and glasses glare need a new photo.
Is a free online passport photo checker reliable?
A free checker can catch many common problems, but it can’t guarantee that the portal will accept your photo. Use it as a first check, then compare the result against the official specification before you submit.
What should I do if the error keeps appearing after several uploads?
Stop and review the photo against every point in the checklist above. Retake the photo if necessary, and make sure your upload attempts haven’t reached the portal’s limit. If the problem continues, check the official Passport Seva portal for current guidance.
Final Thoughts
The message “photo is not valid as per ICAO standards” is frustrating, but it’s usually caused by a specific, identifiable problem. Start with the technical details, then check the background, framing, pose and any filters. Correct what you can through careful editing, retake the photo when the problem is visual, and use an online checker to confirm your result before you upload. With a methodical approach, you can get your photo accepted and move your application forward without wasting attempts.


